
The Love Knot, also known as Solomon’s knot is a fun lacy crochet stitch. It only requires basic crochet knowledge and is a great way to cover a large area with a small amount of yarn.
The Love Knot can be worked flat or in the round. You can begin a piece with it or add it to established stitches.
You can work both increases and decreases when using the Love Knot stitch.
In this post I will walk you through how to work the stitch, increasing and decreasing.
HERE is a link to the video tutorial. It doesn’t include decreasing because that isn’t used often and is harder to work in the round. More on that later.
BASIC LOVE KNOT STITCH
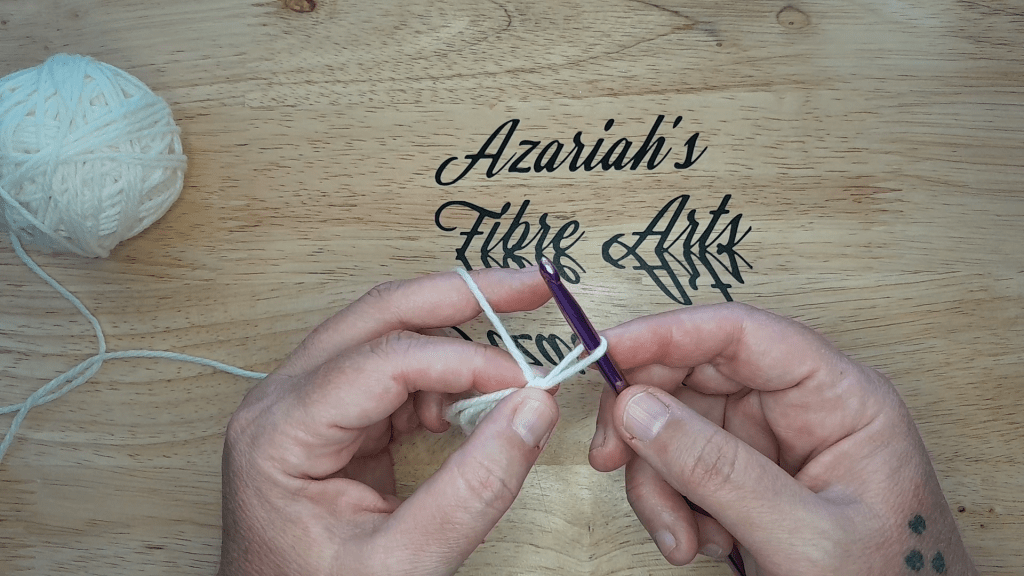
To work the love knot stitch, single crochet into the next stitch or the stitch indicated. Pull up a loop to the desired height. The height of the loop is dictated by the weight of the yarn to some extent. Finer weight yarns look better with smaller loops and heavier weight yarns look better with bigger loops.
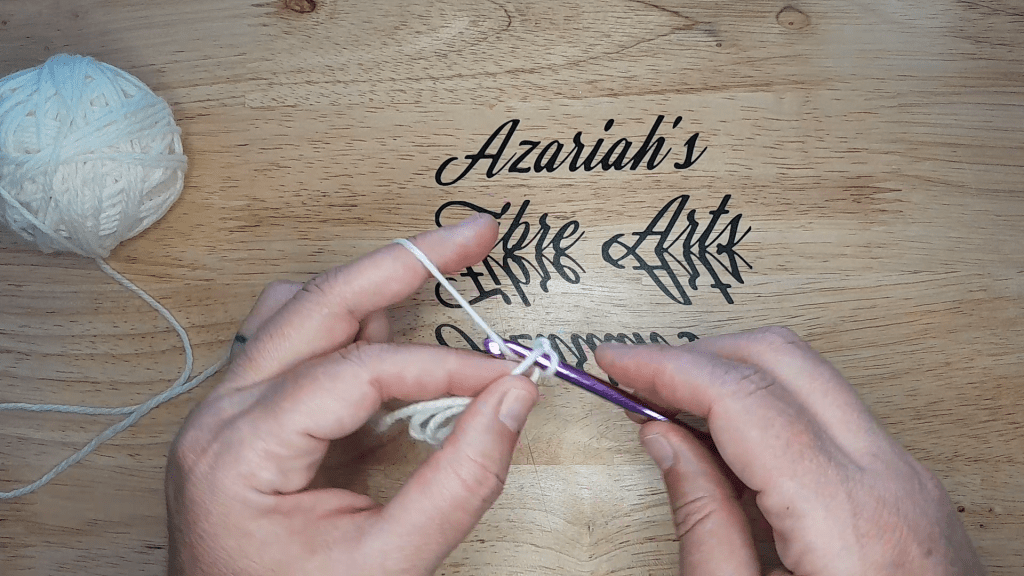
*Hang on to this loop and work a chain stitch right where you’re at.

Now work a single crochet in the back loop of the chain stitch that you just made. This makes the first petal. Repeat from * to make a second petal.
After working the second petal, single crochet into the next stitch or the stitch indicated. Make two petals again. Continue in this manner until you have worked across the row or completed the round.
To continue to work in rows you will need to work as follows. Chain three, this is your turning chain, turn. Single crochet in the top of the first Love Knot, work two petals, single crochet in the same single crochet as before. (Work two petals, single crochet in the top of the next Love Knot) across. Working the extra petal at the beginning of each row will keep the correct number of Love Knots in each row.
To continue to work in rounds you will need to work as follows. Chain three, this is your starting chain, DO NOT turn. Single crochet in the top of the first Love Knot, (work two petals, single crochet into the the top of the next Love Knot) around. When you reach the beginning of the round, join with a slip stitch to the first single crochet. Repeat this round, inserting increase rounds as needed, see below.
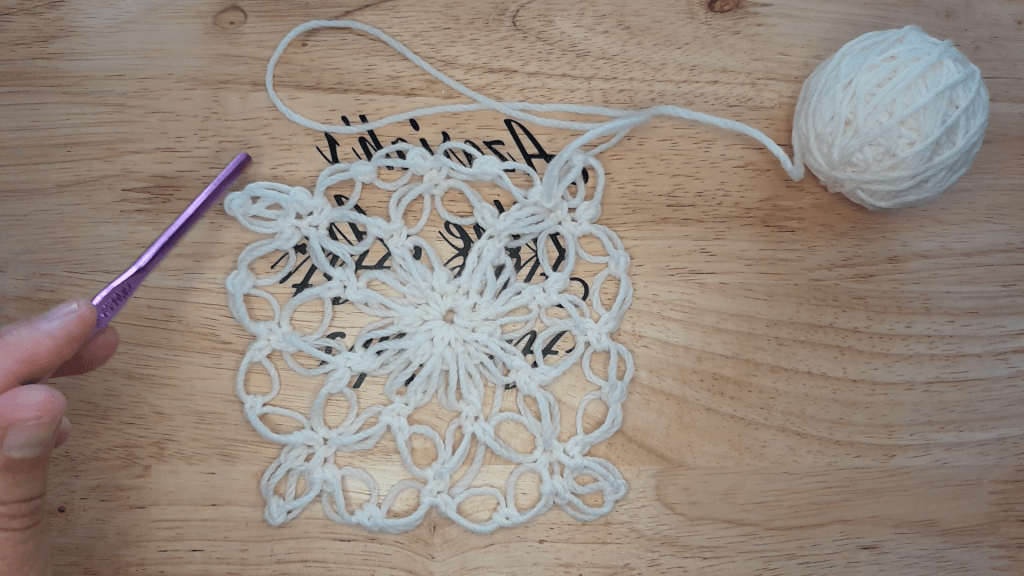
To increase using the Love Knot stitch, work two petals and then instead of working the next single crochet in the next stitch work it into the same stitch you worked the last single crochet. Work two petals again and then work the next single crochet into the next stitch. You can see increases in the photo above. They are what make up each of the four corners.
While there isn’t a “formula” or pattern to increasing using Love Knot stitches like you find with single or double crochets, the placement and number of increases will change the shape of your piece. In the photo above, there were four evenly spaced increases worked and that set the foundation for continuing in a square by increasing in each corner on each round.
To make a circle I like to increase in the center of every Love Knot about every three or four rounds. This means there aren’t any increase lines that could become distracting from the look of the piece. It also means that the work might be curly for a while but it will work itself out when you work another round or two.
You can increase when working flat as well using the method above just applied to rows instead of rounds.
Decreasing isn’t done as often because it isn’t the same as trying to make a piece of crocheted fabric fit the shape of a jar for example. If I am going to use Love Knots to cover a jar, I will use an edging of single crochets to shape the top and fit the cover to the neck of the jar.
I have only decreased using Love Knots when I was making triangles that hang from a skirt. I was working in rows. After the turning chain and the first single crochet into the top of the first Love Knot, (work two petals, single crochet in the top of the next Love Knot) across to the end. This will naturally cause this new row to have one less Love Knot in it.
The Love Knot is a versatile stitch and I hope that you find many uses for it in your own crochet projects!
Happy Making!
