

This a knitting term that you might not be familiar with and that’s completely okay. I didn’t hear the term until I had been knitting almost 20 years. I don’t know if it is a regional thing or what. I first heard from a newer knitter when I joined the knitting guild in Las Cruces, New Mexico.
Because of the context of the conversation and what she was showing to us, it made perfect sense why it would be called this.
“Rowing out” is when you are working stockinette stitch, flat and the gauge of your knit stitches isn’t the same as your purl stitches. There are a lot of ways to fix it. I will go over a few in this post, share my favorite and some before and after so that you can see the results.
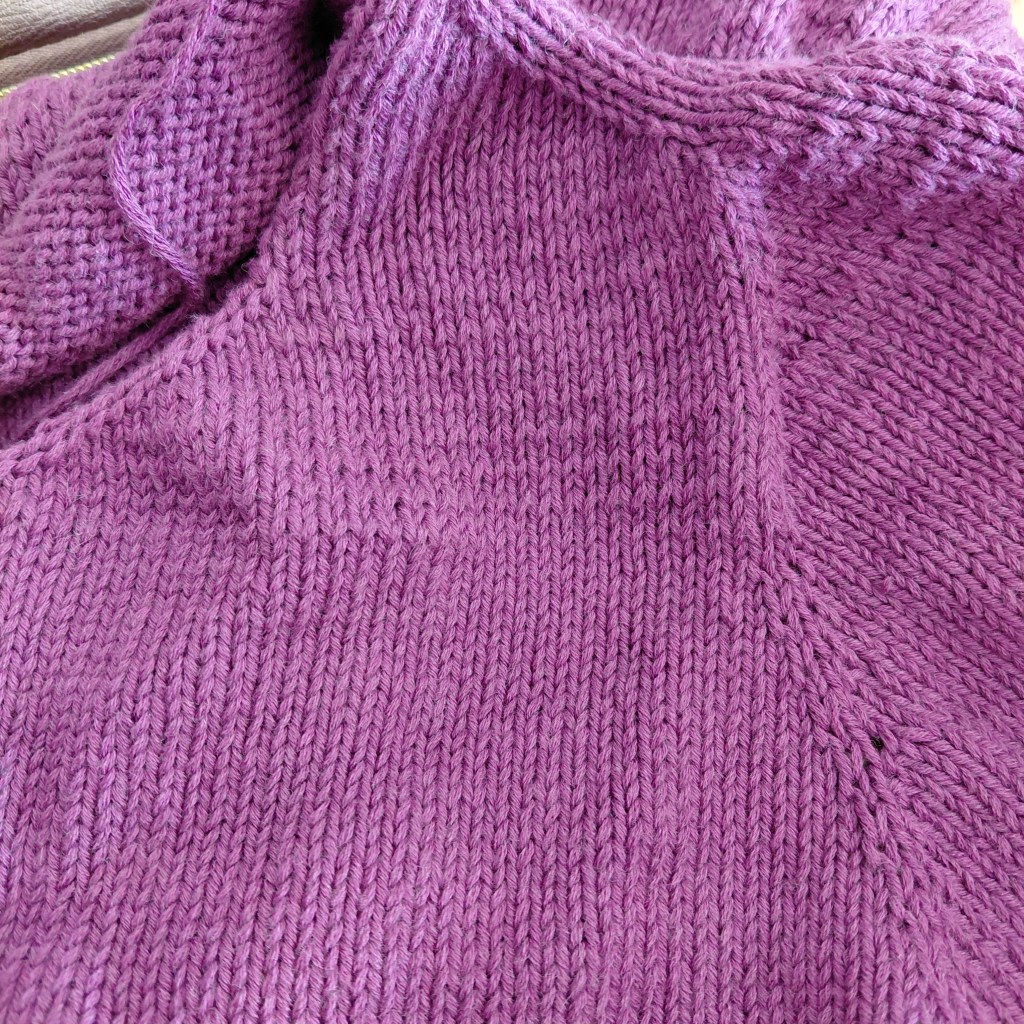
As you can see in the photo below, there is an area towards the top that isn’t as smooth as the part towards the bottom. I would bet that a lot of you have had this experience. I was working a tee from the top down. It began with rows, that’s the uneven part, and then moved into rounds, that’s when things smoothed out, because I was knitting every round, no purling.
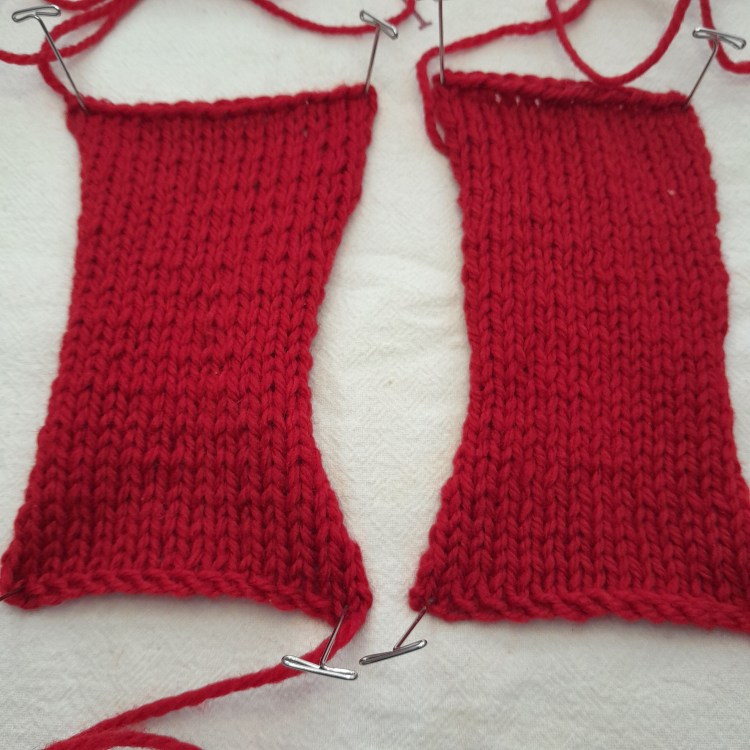
These pieces here are both the same; same yarn, needle, pattern and even the same knitting session but you can see that one is smoother than the other.
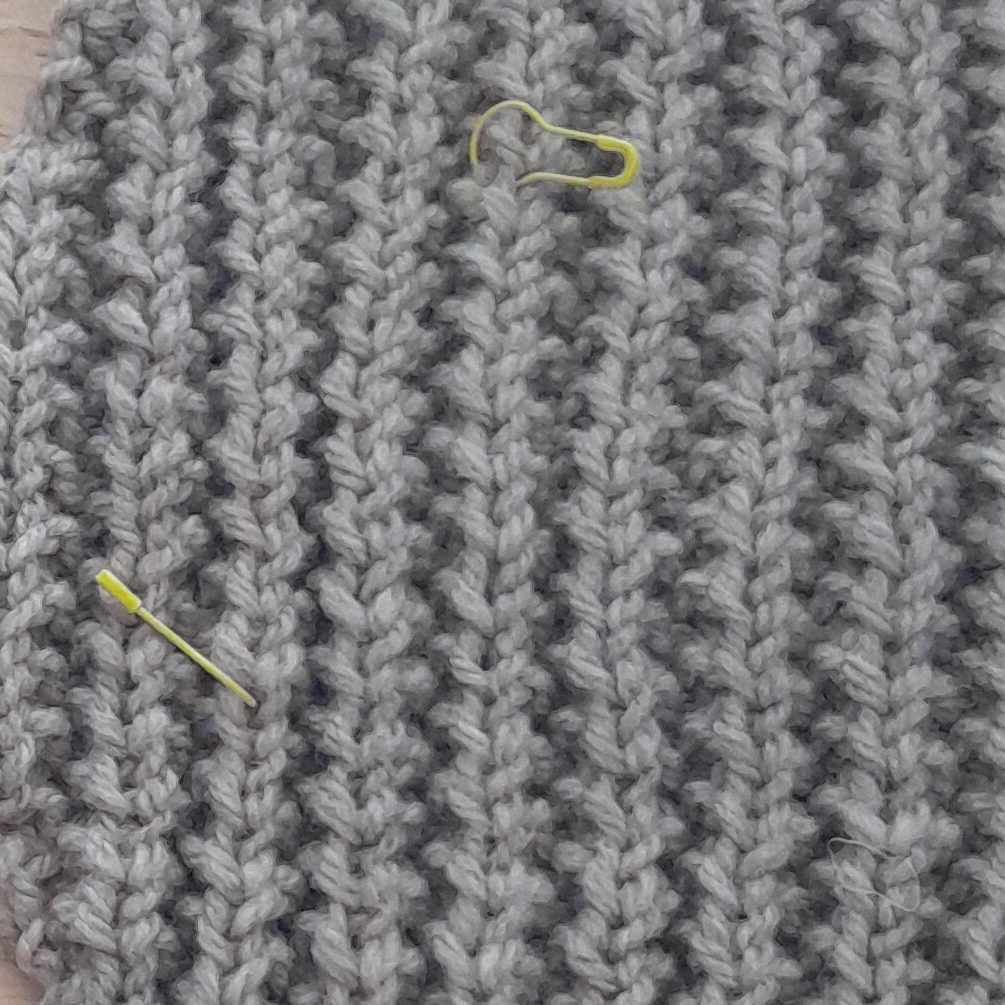
This piece here is a broken rib pattern but on the “spine” stitches you can see that every other row is knit and every other row is purled because it looks like the stitches zig-zag a bit from bottom to top.
The first time I “fixed” my rowing out was before I knew what it was called and was on accident.
I was working on a test knit for a book. A full length knitted wool dress. I love it and wear about once every other year or so. I live in southern New Mexico and it isn’t often cool enough and the occasion at the same time. Anyway, the sleeves were worked last or even just after the bodice, I don’t remember. They are picked up and had a sleeve cap worked using short rows. I was not about to turn that entire dress for each of those short rows, no way.
So I decided to knit both directions. I am a left handed knitter so switch “right” for “left” and “left” for “right” as you read what follows. I knitted the stitches off of the right hand needle, which is my normal giving needle. Then instead of turning the work to go back and purl the stitches for the next short row, I followed the directions as written but changed “purl” to “knit” and knitted the stitches off of the left hand needle.
This will take some practice, mostly getting the stitches to sit correctly on the needle for the return row or just paying attention to the way they are sitting so the they don’t get twisted. Grab some yarn and needles and give it a go!
Another method, that I didn’t actually try, though those of you who read this blog might remember me mentioning, is to work your knit rows are you normally would and then for the purl rows to work them using the Portuguese knitting technique. This involves the needle and the yarn sitting in different positions than normal and can result in smoother stockinette. You would use your regular method for the knit stitches.
I’m sorry that I don’t have any personal experience that I can share with you on this. I was close to giving it a try when in another book I was working through, I saw that you can change your purl stitches without completely changing the method of knitting. This is the method I have chosen.
Wrapping your purl stitch the opposite direction around your needle will automatically make that stitch smaller because the yarn has less distance to cover. This will change your gauge, so please don’t switch mid project and definitely swatch before beginning a new project. Check out this YouTube tutorial to see the stitch in action.
Of course we all want to see how this is working for everyone. Share your photos in the Google Drive!
Until next time,
Happy making!
