


Each month through my weekly newsletter I share special stitches and techniques that go with the monthly pattern release, then I collect them all here in case someone missed something.
If you would like to received the weekly email and see the techniques as they come out sign up for my newsletter on the “Links” page.
Bead Placement
In this shawl, the owl is made up of cables and beads are used for the eyes.
I placed each bead individually with a crochet hook.
I recently learned about the difference in a design that stringing on beads makes. I do not suggest stringing beads on for the owl. First of all because that is a long way to push the beads along. Secondly, they won’t sit where they need to, to make the eyes of the owls.
Choose the smallest hook that you can stand to work with and will go through the hole in your beads. I like to work with very tiny hooks, even with the 6/0 beads, because then more of them on the hook at a time.
Please do be careful working with these tiny crochet hooks. I was impaled by one once and it isn’t fun.
When it is time to place a bead, knit the stitch that the bead goes on and then place the bead over the new stitch and place it on the needle.
Placing the bead and knitting the stitch presents 2 problems, first it actually places the bead on the row or round below where the designer has placed it.
Secondly, it might pull that stitch too tightly. If you place the bead on a stitch and then knit it, you will find it is tighter to work into and may even distort your work. That is because that stitch was made on row or round and the yarn that is in that stitch is all it has to pull from.
Placing bead after knitting the stitch, means that stitch can get more yarn if it needs to without pulling on the stitches next to it.
Try the swatch below to see the difference.
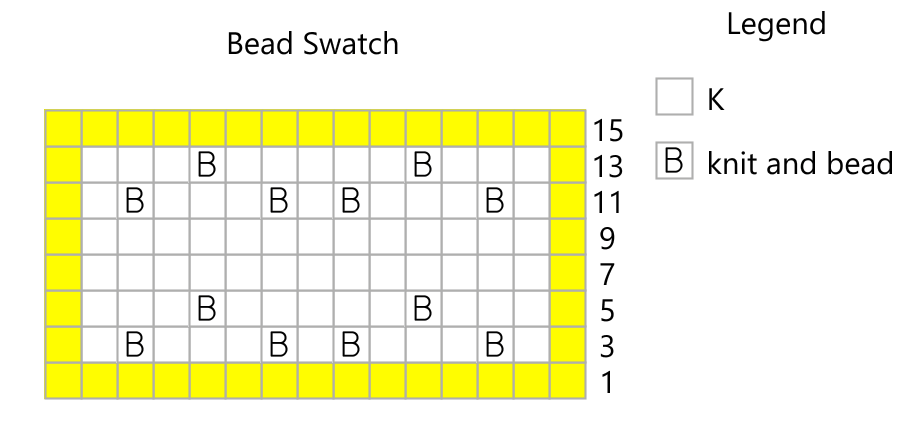
Cast on 15 using and desired cast on.
K 2 rows.
Work Rows 3-15 of the swatch using the Legend to identify stitches.
The yellow boxes are stitches that are knit on both the front and the back.
For Rows 3 and 5, place the bead and then knit the stitch.
For Rows 11 and 13, knit the stitch and then place the bead.
After Row 15, work one more knit row.
Bind off. Weave in ends and block.
Examine your work and share with me what you’ve learned.
This pattern is available in both my Ravelry and Payhip stores.
